With Feedburner Email subscription form, you can easily build your own Email List for FREE via your blog. I have been using this on my blog and honestly speaking over 80% of TerryDon Tech subscribers are EMAIL subscribers. If you are an internet marketing pro, I believe you know what this means in terms of making money online. Today, I am going to show you how to add the Feedburner Email Subscription form to your blogger blog.
If you are new to blogging and do not know what I am talking about, the picture below is what Feedburner Email Subscription form looks like:

The form is delivered by FeedBurner.When anyone subscribes, by entering his/her email address inside the form, he/she will receive an email containing your blog post whenever your blog is updated. This makes it easier for your blog readers not to be missing any new post you publish on your blog. This, I also believe helps in building trust.
Steps in Adding The Form To Your Blog
1.First,Sign in to your FeedBurner account.If you don't have a FeedBurner account yet,you can register it here If you are registering with Feedburner for the first time, you might need to read : How To Detect The RSS feed of any blog.
2.Click on the "My Feeds" link at the top of the page and next ,click on your blog name[look at the picture below ]

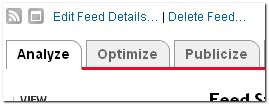
3.Next,Click on the 'Publicize' tab as shown below.

4.Select the "Email Subscriptions" option[look at the left sidebar]

5.Next, you will see like this

Click on 'Activate'
6.If you look at the sidebar now,there are a few more options under the Email Subscriptions column namely Subscription Management,Communication Preferences,Email Branding and Delivery options.Edit them according to your needs.
 Now,Click on the Subscription Managemant option and copy the code they provide[see the picture below ]
Sign in to your blogger dashboard>Design>add a page element>html/javascript
and paste the code and SAVE THE CHANGES.
That's all.
Note: You can edit the width of the form in the code you copied in step 6 and its always good to paste it on the sidebar.
I hope this helps....
Note: You can edit the width of the form in the code you copied in step 6 and its always good to paste it on the sidebar.
I hope this helps....
Feel Free to share this blog post with your friends using the share buttons below this post.
If you have anything to say or ask, Kindly make use of the comment form below.


0 comments:
Post a Comment
Let us know your opinion about this post by dropping your comment(s).